I was looking to create a custom nightstand for my girlfriend that would provide her all the storage she needed, with a very modern design.

For something like this I find it is always best to start with a sketch so I can better visualize what I want to make.

Then it’s time to get some wood and get started, and of course glue some boards together to start creating the shape.

Once all the pieces are created I always like to test fit everything before gluing it together.

Then more glue, and more clamps to help bring it all together. At this point it’s kind of a holding pattern until all the glue is dry.

After that it was time to start creating the two separate tops for the nightstand making sure the will fit the design perfectly.

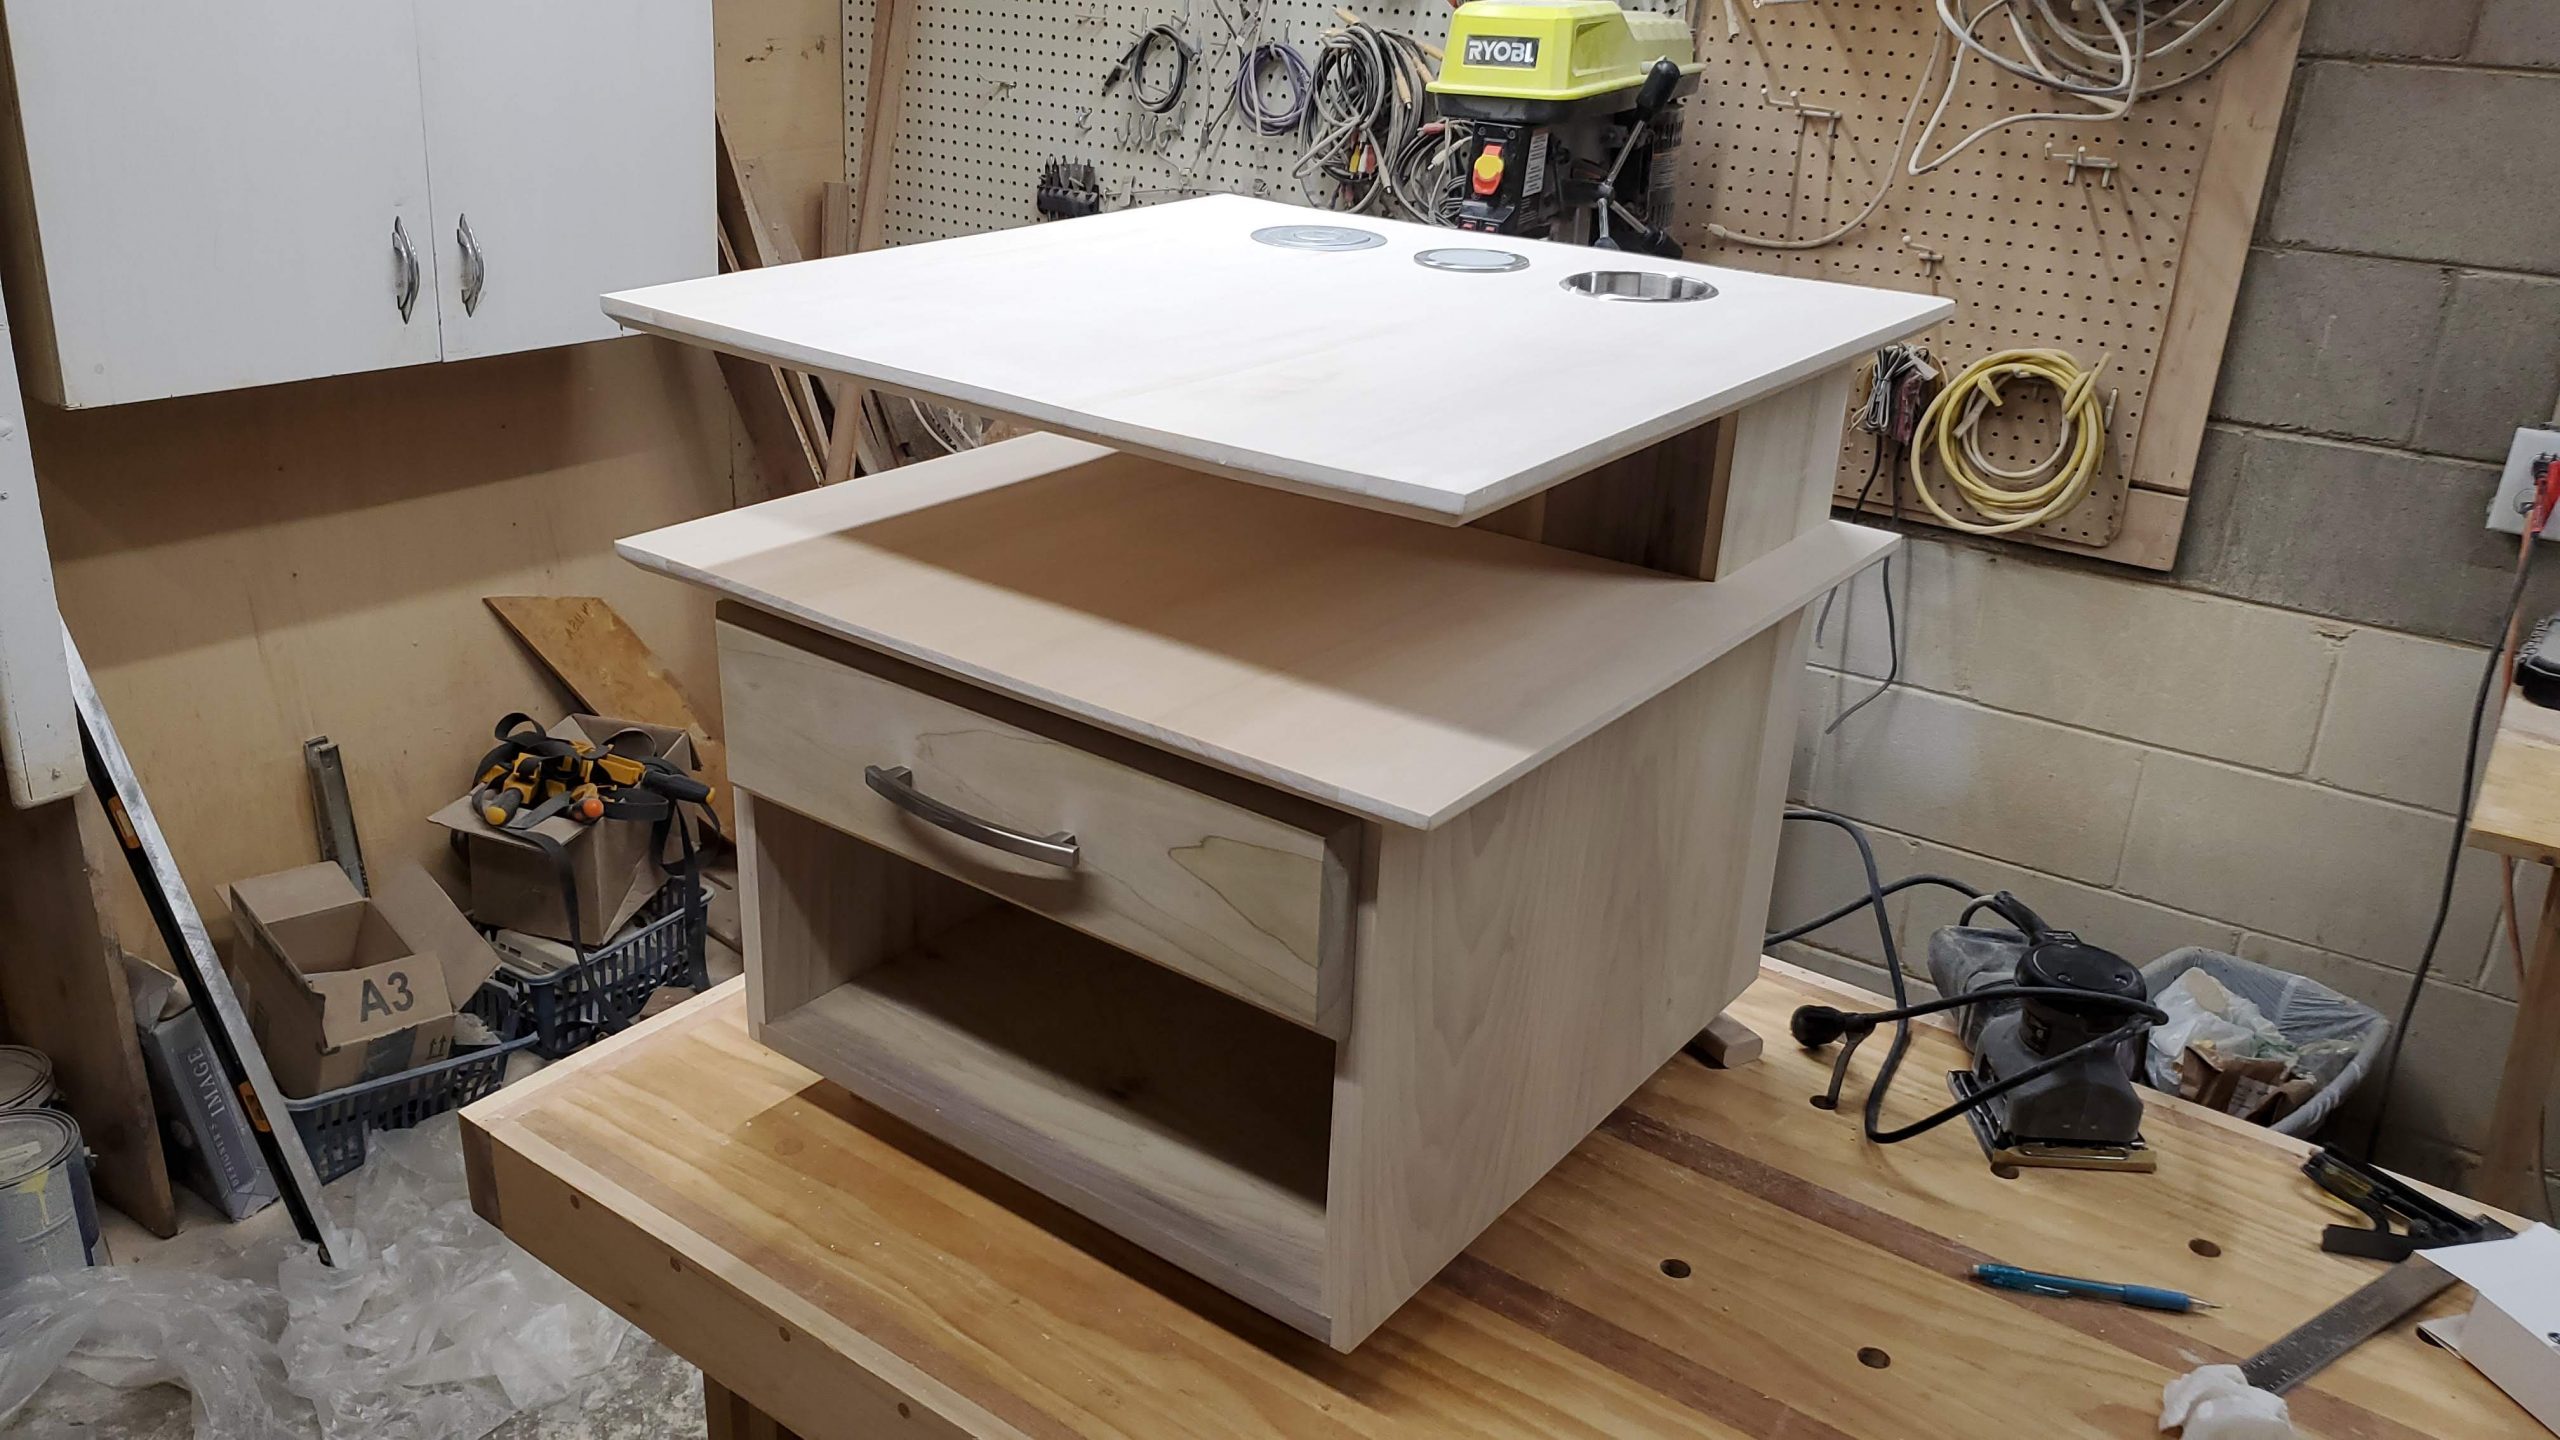
Then it was time to test fit the tops and install the drawer rails and test fit the drawer face.

Then it was time to add all of the other hardware. A pop-up power strip, a wireless cell phone rapid charger, and of course… a cup holder. Overall the nightstand turned out pretty much exactly they way that I originally envisioned it in my mind. The upside is my lady loved the final project.