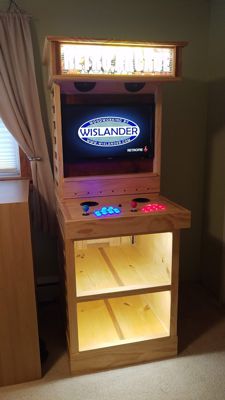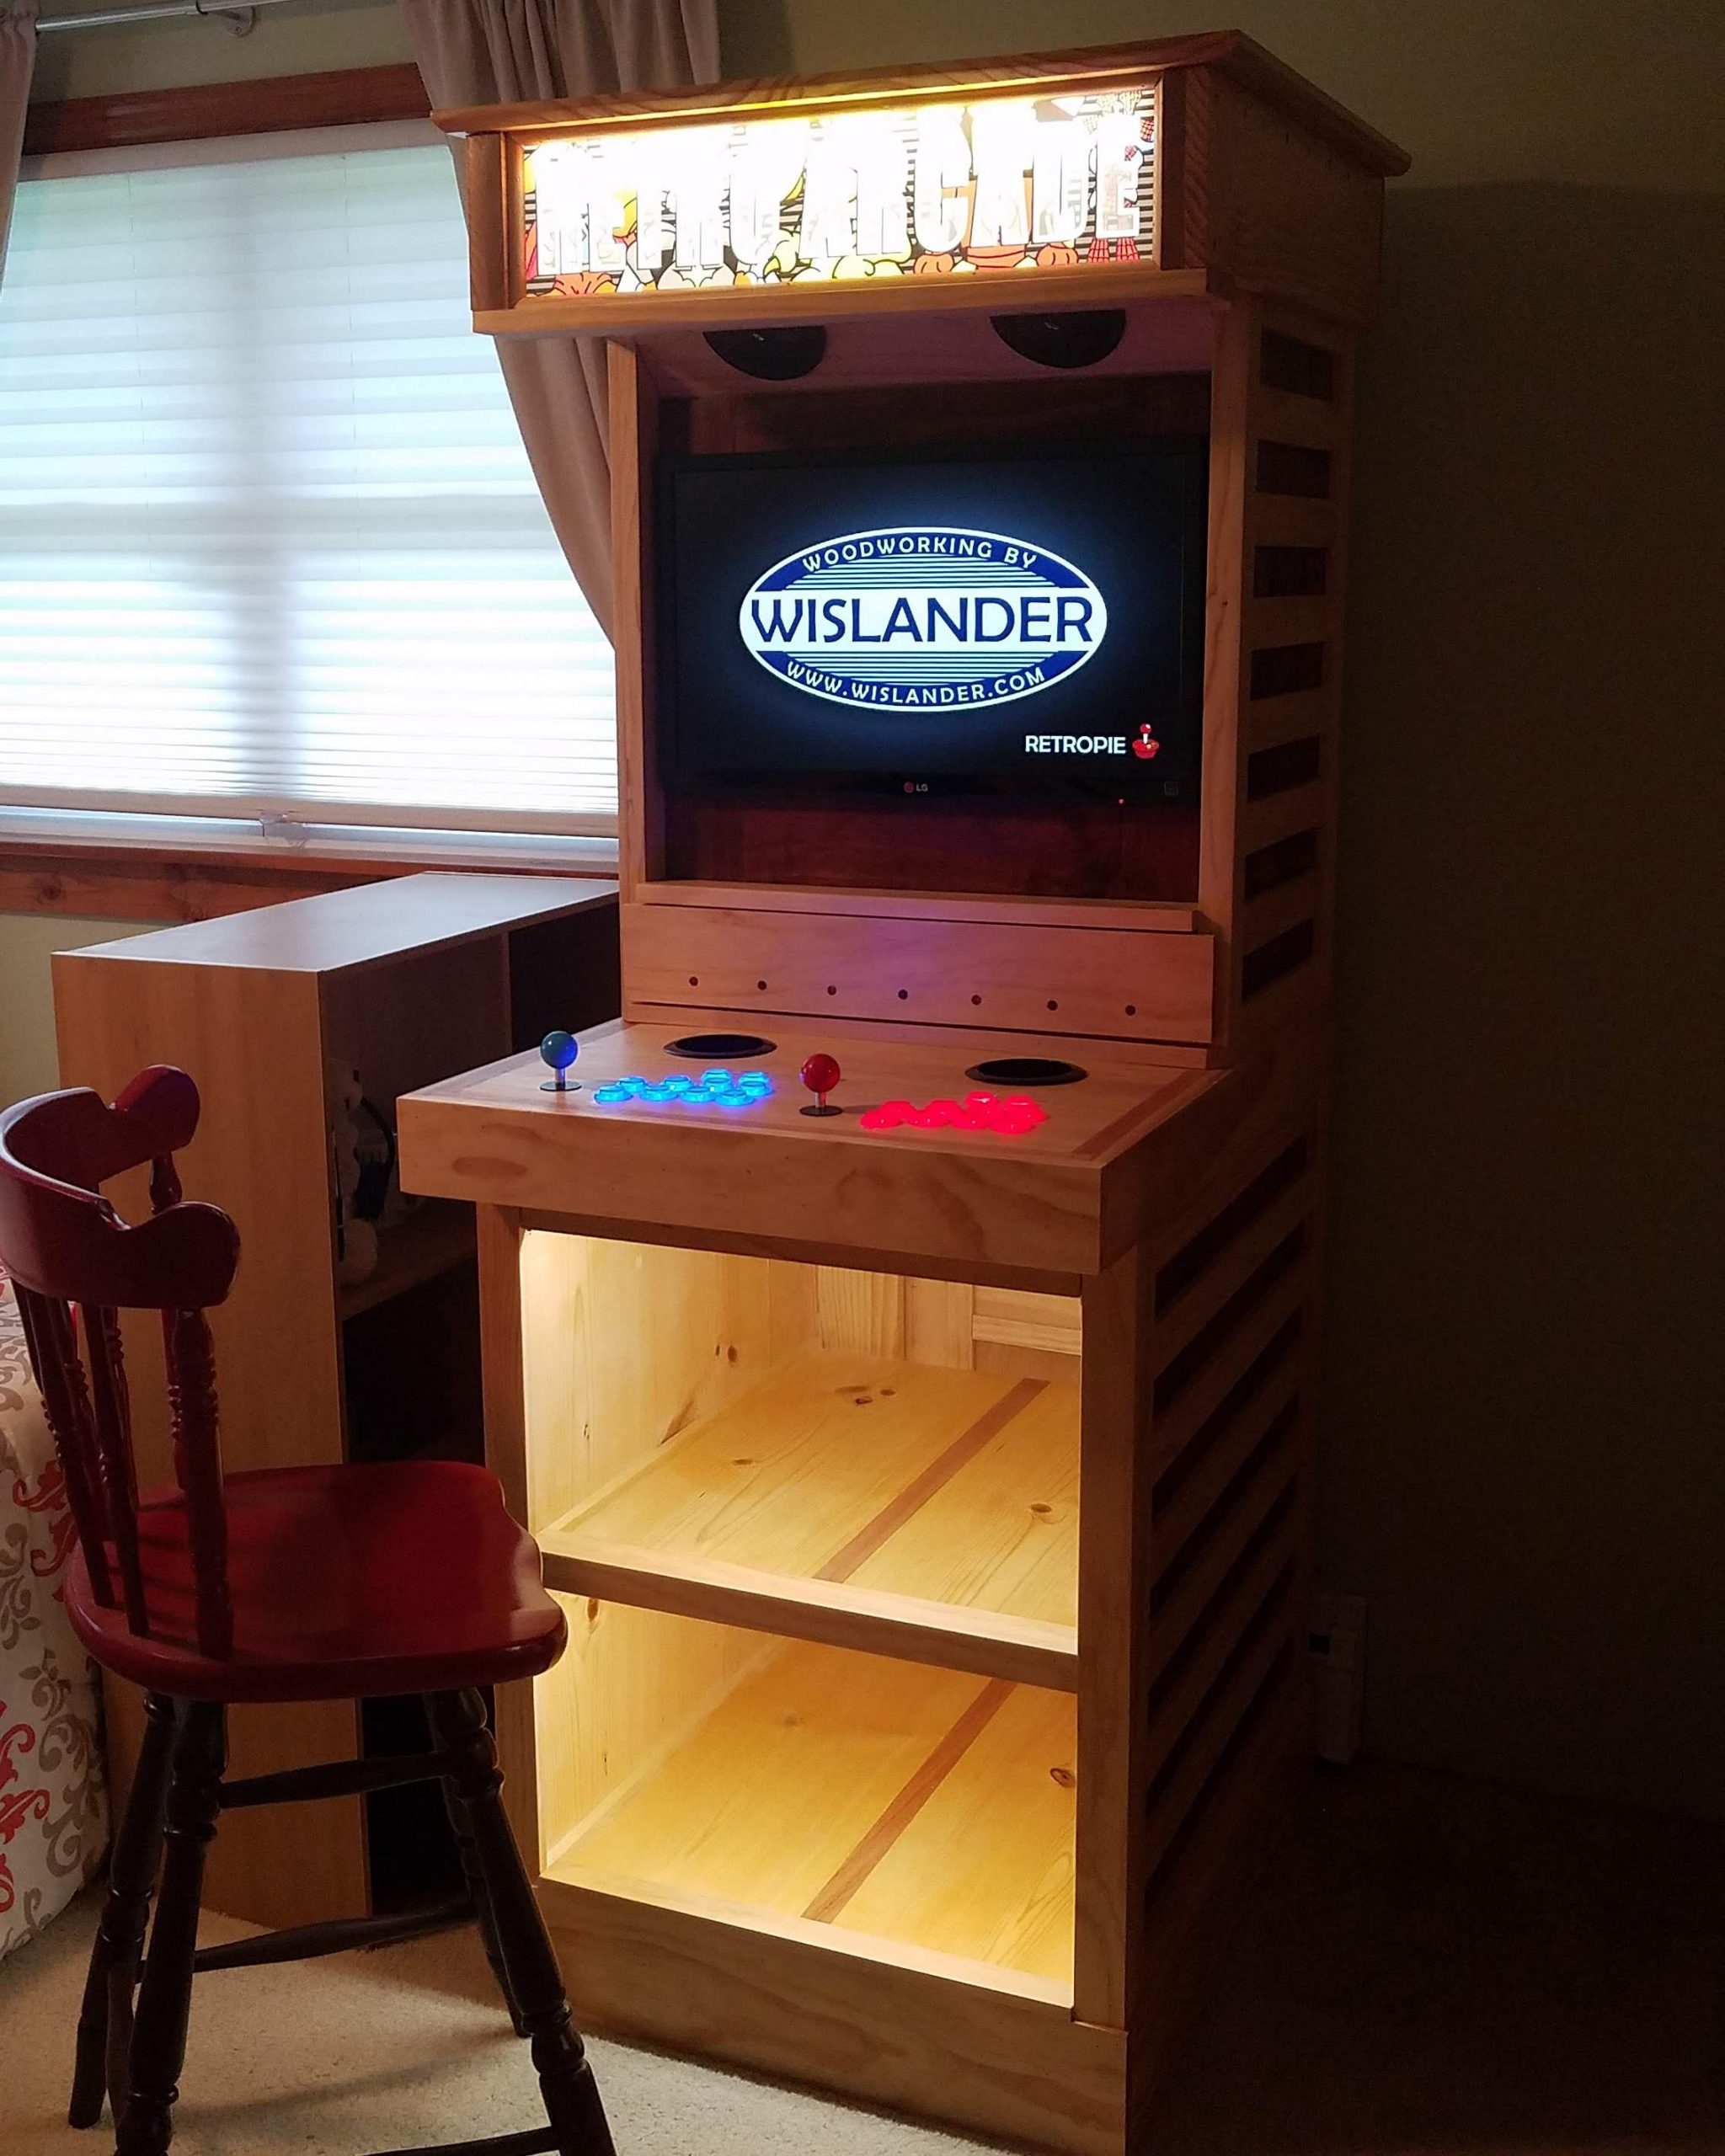
Sometimes you get an idea, and you just have to run with it. In this case I had a Raspberry Pie 3 B+ board laying around, and decided to put it to use in a fairly permanent kind of way. Which ended up being a full blown custom upright arcade unit, using both old school look and feel, with a custom carpentry cabinet slant to it, and with some modern lines and lighting.
Now this project didn’t start out with that in mind. Originally it started out with me thinking about building a more compact, portable controller deck with a Raspberry Pie integrated in it, running RetroPie to control the game emulation. As with most simple ideas, this one took on a life of it’s own.
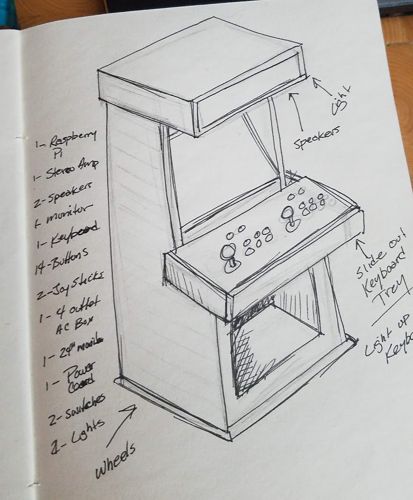
The design was very rough, and did not have a lot of details. In fact, I started to buy pine before I really knew just how big it would be, or the actual final design for the build. I will add, you should not do this when you are making any project, even if you get lucky and it works out in the end.
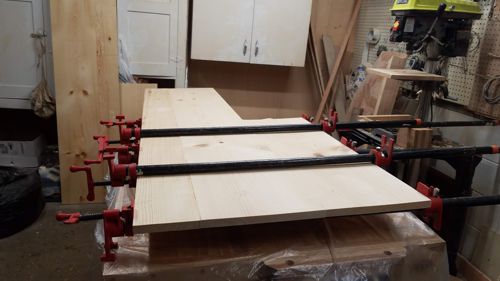
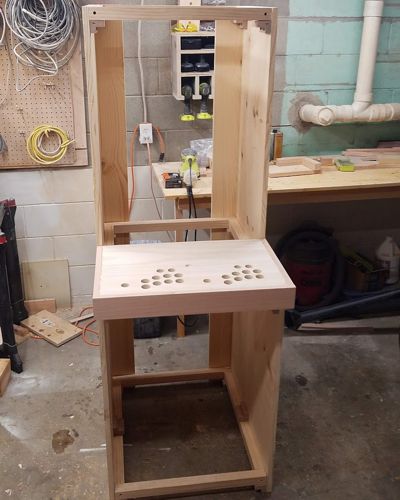
So the general idea for the build was this. I needed the game deck to be high enough to be able to comfortably sit in front of it with a bar chair I already owned, and it had to be tall enough that I would not bump my head on the marquee. I also did a quick internet check to find that most old school standup arcade machines were between 65″ and 75″ inches tall, so I split the difference and went with 72″ tall. Also opted to use pine throughout for something a bit more durable than composite board or plywood.
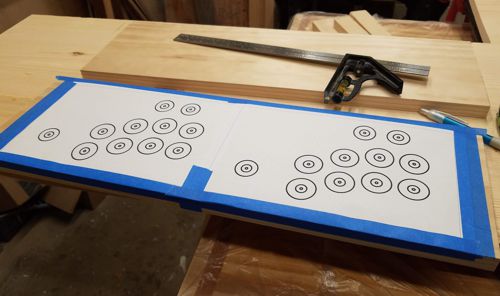
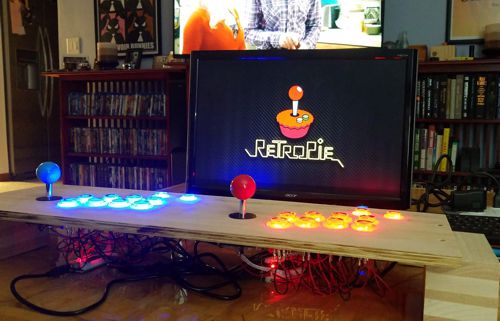
The controller deck layout was fairly simple. I downloaded a standard layout PDF from the internet, broke the document apart and used my CorelDraw software to space the buttons a bit better, and set them in a simple arch instead of straight rows or a diagonal line. I also designed the deck to be big enough to hold two sheets of standard letter paper with room in the middle for a volume control knob. And enough space underneath for all of the wiring, the controller encoder cards, and the audio amplifier card. Since I do not own a CNC machine, I created the desk in two pieces so all of it could fit into my small drill press.
As I was preparing the controller deck I also needed to figure out how wide to make the cabinet. It really could be any size, but I needed it to be wide enough to hold my 24″ monitor I was planning to use, and since the monitor was 22.5″ wide, and I wanted to leave room around the edges, I opted to make the space between the two side 23.5″, and the cabinet roughly 25″, with trim around 27″ wide. Again. This is free building around a component, and not a preferred method to design anything.
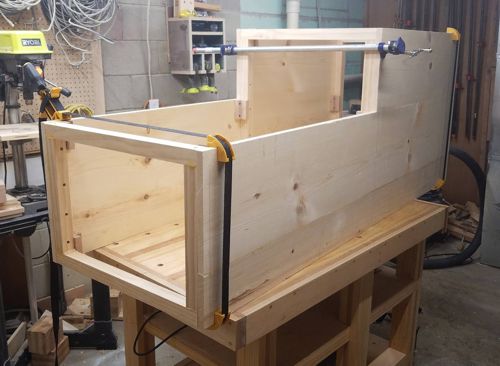
There was a moment of concern when I stood the cabinet up the first time of would it be solid, or had I just built a wobbly skyscraper. As with most of my designs, I had nothing to worry about because the whole thing is very over engineered. Which also means it will end up being fairly heavy in the end.
The next step was to test fit the controller deck, and much to my happiness, the deck and the cabinet layout worked perfectly, and was so well balanced they were stable even when not mounted into place. I was also happy to see that my math skills are still intact and all of my size gestimations were spot on. Again, luck is very important when you are doing that, as well as a general understanding of geometry, algebra, and physics.
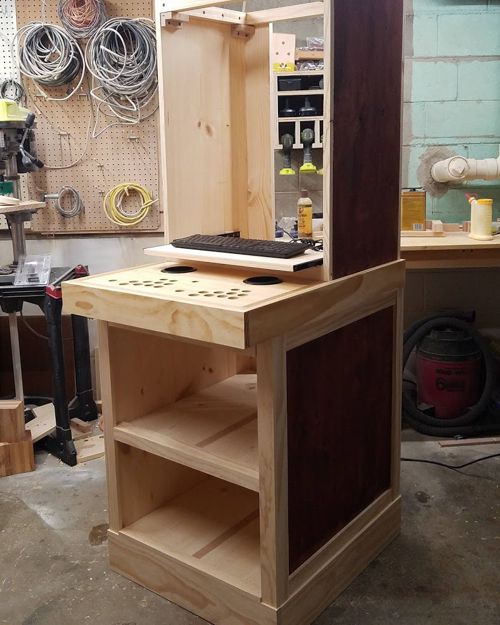
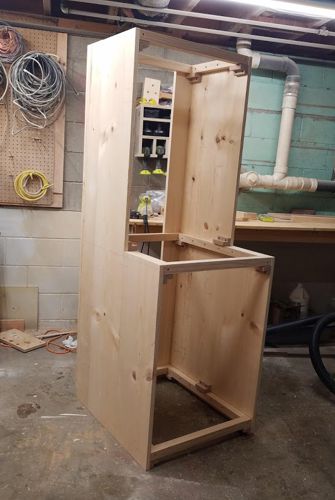
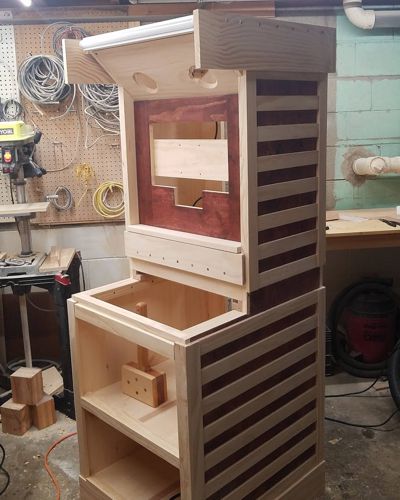
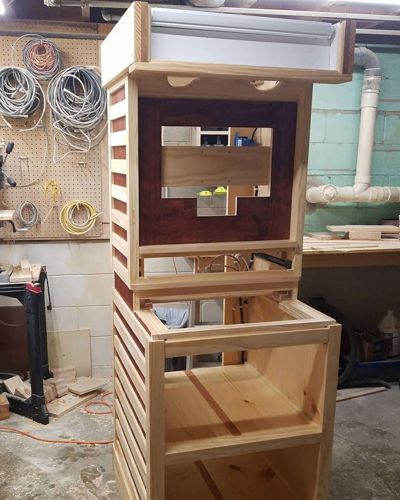
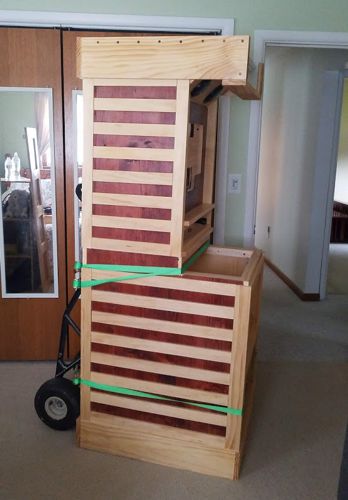
Every once in a while I come up with an idea half way into a build that requires me to step back and make a few quick design changes on the fly. This project seemed to be a continuous series of this happening, mainly because I was building it in my free time, and not all at once, so I had time to think about it while driving to and from my real job. One of these sessions I decided not to waste all of the cabinet void area, normally where the coin drop is located, and not enclose it and add a couple of storage shelves in the bottom; another was instead of painting it and adding a bunch of characters or logos on the side I would stain the sides dark and trim it out with a few accent boards. I wish I would have though about that before starting to glue it together.
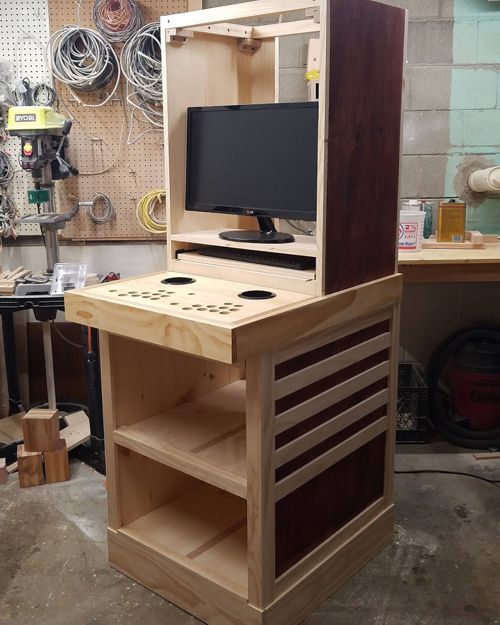
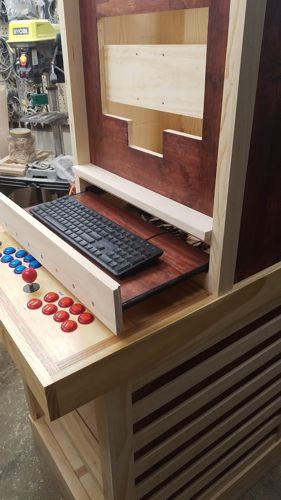
Then I thought it would look better with some horizontal slats to really make the dark panels pop, and instead of having a keyboard hook-up available, why not build a hidden keyboard tray right in the cabinet. Sure, why not. And you know what else it needed… cup holders. Amazon really must have assumed I was drunk ordering some of this stuff.
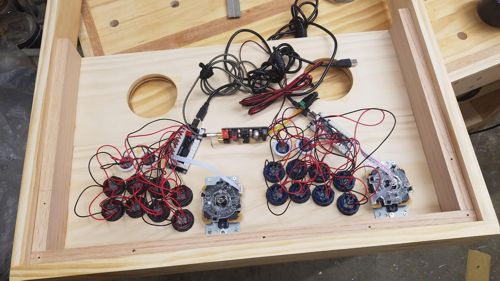
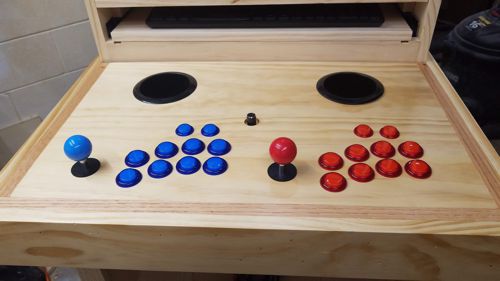
After awhile you have to say stop adding new ideas and start moving everything forward, so you can actually think about finishing this thing. At this point I finished out the control desk with several coats of hand rubbed poly, and after it dried I sat down and installed the buttons, joysticks, encoder cards, and two channel stereo amplifier card. The card I used actually has a volume with an off position the system can be played at full blast or with no audio at all. In the photos above it is still not mounted into place, I actually made sure it was fairly modular until it was time for final assembly. Including there is a cover for the bottom to hide the wiring from being visible from the outside.
Once the wiring was done, and the keyboard tray was done, then came the fun part. creating the monitor mount. You cannot really just buy one, and I will once again mention, I really should have thought about this before I started building this, but I figured how hard can it be? Well, because of luck, the back electronics of the LG monitor I was using extends exactly 3/4″ from the rest of the monitor, and all of the connections go straight back from the monitor, it was actually not that bad. The hardest part was creating the VESA mount hold alignment to put the screws through to mount it to the machine; and making sure they were centered up in the space.

The test fit was successful, and it gave me a chance to layout the speaker mount. What are the odds that I happen to create a speaker mount that required a standard 45 degree bevel, and a 33 degree bevel to sit right in the space I had allocated for it? apparently pretty damn good. *laughter* The speakers are standard all encased 4″ marine speakers, and they fit in a nice 3 1/2″ opening. The exact same size as the opening used to hold the cup holders on the controller desk.
The next step was to trim out the speaker mount, and to start building the marque. I was at a stopping point for a couple of reasons, One was I needed more lumber, the second was I had ordered a custom marque panel from Game On Grafix, because why not, and I wanted to make sure that I was correct in my order size, and didn’t want to build the marque to then have to tear it down and build it again.
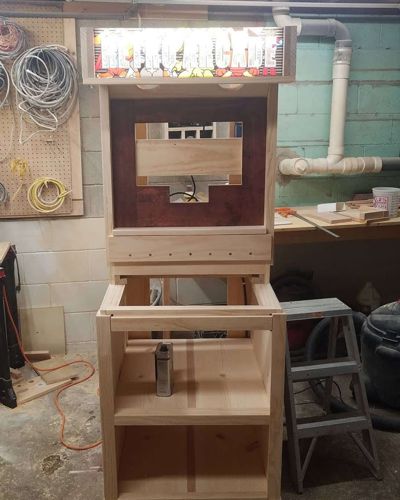
I should have trusted my math. When it came it was a perfect fit, and those guys did an amazing job. The marque is based on my original design using characters from my recently retired web comic “The Angry Bunny”. For the quality of work the company does, the marque display panel was very affordable, and the turn around time was amazingly fast.
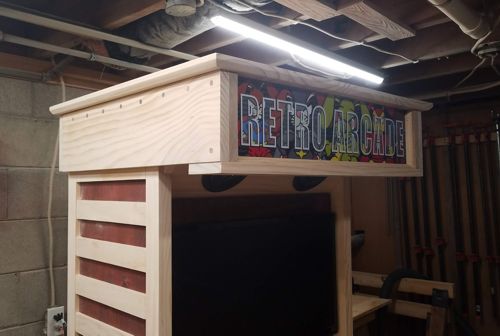
The next step was to trim out the marquee, and to create the the top for the cabinet and the overall design was done. Next it is time to put the finish, wire everything up, and of course put it all together for the final time. I was planning to put foil in the marquee to help the light, but realized I had a number of dry erase board remnants laying around that were just perfect to mount in there and bounce the light.
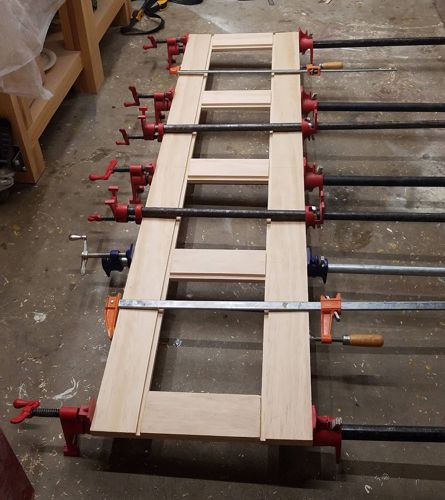
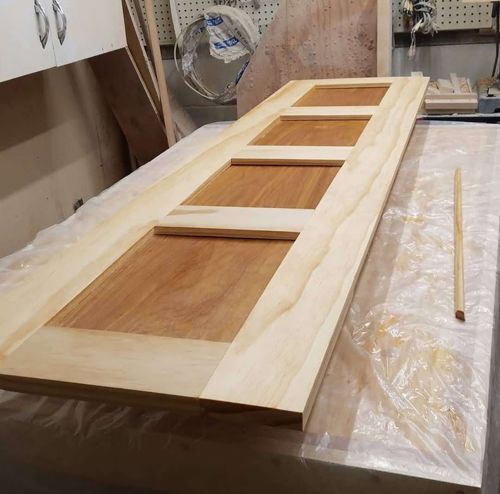
Did I mention I still needed to build a access door for the back of the cabinet, Of course I didn’t because that was not on my radar until I was all happy that I had finished the main cabinet. So I looked at what little wood I had left, and had some remaining birch backing board panels laying around that was just enough to create a functional and nice looking access door. I also had picked up some self-closing hinges from the clearance aisle some time back so I was able to pull together everything I need with items in my basement to make the door work.
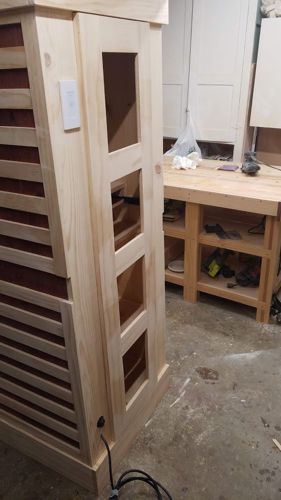
While test fitting the door I also installed a WiFi connected main power switch, a network cable pass-through port in case the Raspberry Pi WiFi signal was not able to connect to my home network, and of course made sure there was a way to get power into the cabinet itself.
Then it was really time to start applying finish. I used five coats of wipe on polyurethane to seal everything up, and give the wood a nice mellow look to it, It actually really brought the overall design together.
It also made me regret the number of slats and nooks and crannies there were on the design, and made me wish I had a spray room to apply finish *laughter* but in the end it was all worth it.
At this point all that was left was to move it upstairs to do the final assembly and have fun with it. Did I mention the entire cabinet is WiFi and Alexa enabled, so it can be turned on and off by voice command? I think I may have gone a bit crazy on this, but was was fun to combine my woodworking and tech skills together on another project.